Recording Great Video Tutorials
The gear matters less than you think. Here is what actually separates a tutorial people finish from one they abandon.
TL;DR
Great video tutorials depend less on gear than on decisions made before recording: plan what viewers will be able to do, respect attention with short focused videos, spend money on sound before video, polish in editing and caption everything, then learn from viewer data.
On this page
Watch enough how-to videos and a pattern emerges. The ones that help you are rarely the ones with the slickest production. They are the ones where someone clearly decided, before they hit record, exactly what they wanted you to walk away able to do - and then refused to waste your time getting you there. The expensive camera, the animated logo, the background music: none of it correlates with whether you actually learned the thing.
This is liberating news for anyone intimidated by the idea of making tutorials. The barrier to entry is not money. It is a handful of decisions, most of which happen on paper.
The plan is the tutorial
The most common mistake beginners make is treating a tutorial as something you improvise into a microphone. You open the screen recorder, start talking, and figure it out as you go. The result is predictable: tangents, dead air, a forest of “ums,” and a video three times longer than it needed to be.
The fix is to write down a single learning outcome before anything else. Not a topic - an outcome, phrased as something the viewer will be able to do. “Understand spreadsheet formulas” is a topic, and a vague one. “Write a SUM formula that totals a column” is an outcome, and it tells you precisely what belongs in the video and what does not. Anything that does not move the viewer toward that outcome gets cut. A tutorial that teaches one small thing completely earns more trust than one that gestures at five things and lands none.
Once you have the outcome, sketch a two-column script: what you will say on the left, what you will show on the right. This feels like overkill until you try it. The script is what kills the “ums,” because filler words are the sound of a brain searching for the next sentence. Give the brain the sentence in advance and the filler disappears.
Respect the limits of attention
There is real science underneath good instructional video, and it is worth knowing one idea from it: working memory is small. People can only juggle a few new pieces of information at once, and the moment you overload them, learning stops. Richard Mayer spent years documenting how multimedia either helps or hinders this, and the practical conclusions are almost suspiciously simple. Cut anything inessential. Do not fight your own narration with background music. Show on screen while you explain with your voice, rather than burying viewers in dense on-screen text. Break the lesson into small chunks the viewer controls.
In other words: less is more, and silence is a feature. The instinct to fill every second is exactly wrong.
Spend your money on sound
When people do decide to buy something, they buy the wrong thing. They buy a camera. But for the screen-and-voice tutorials that make up the vast majority of useful how-to content, the camera is nearly irrelevant. What viewers cannot tolerate is bad audio. A slightly soft picture is forgivable; a hissing, echoey, muffled voice sends people to the back button within seconds.
So the first dollar goes to a microphone - even an inexpensive USB one is a dramatic upgrade over a laptop’s built-in mic. The next improvement costs nothing: get the mic close, record in a small room with soft furnishings to kill echo, and turn off the fans and notifications. A closet full of clothes is a better recording booth than most home offices. Pair that with a free, capable tool like OBS Studio, a clean desktop, and large on-screen text, and you have a setup that sounds and looks professional for almost no money.
Recording is forgiving; editing is where polish lives
The other paralyzing myth is that you must nail the whole thing in one take. You do not. Professionals fumble constantly on camera - the difference is that they cut the fumbles out. Record in segments. When you flub a line, pause, clap once so the spike is easy to find on the waveform later, and simply say the line again. Speak a little slower than feels natural and leave room to breathe.
Then editing becomes mostly subtraction. Trim the dead ends, cut the mistakes, tighten the long pauses, add a short intro that states the outcome and a short outro that points to a next step. Two or three well-placed callouts - a zoom on a tiny button, a highlight box - guide the eye at the trickiest moments. That is ninety percent of the polish, with none of the motion-graphics overwhelm.
Caption everything, then learn from the data
One step is not optional: captions. They are not decoration. They serve deaf and hard-of-hearing viewers, the enormous share of people watching with the sound off, non-native speakers, and anyone in a noisy room. Auto-captioning gives you a fast first draft, but it garbles technical terms, so you must proofread every line. Attach the result as a sidecar file and your tutorial becomes usable by everyone instead of quietly excluding a slice of your audience.
Finally, publishing is not the finish line - it is the start of a feedback loop. A specific, keyword-first title and a readable custom thumbnail decide whether anyone presses play. Chapters in the description let viewers jump to what they need. And after a week, the retention graph will tell you, mercilessly and usefully, exactly where you lost people. You do not have to re-edit old videos. Just carry one lesson forward into the next one. Do that a handful of times, and the nervous beginner quietly becomes a confident, consistent creator - no expensive camera required.
Key takeaways 5
- Planning the outcome matters more than equipment.
- Keep videos short and focused on one task.
- Audio quality matters more than video quality.
- Recording can be forgiving; editing creates polish.
- Add captions and use analytics to improve.
Watch & learn

Frequently asked questions
What equipment do I need to record video tutorials?
A decent USB or lavalier microphone, screen recording software and a quiet room cover most needs. Good audio matters more than an expensive camera.
How long should a video tutorial be?
As short as possible while completing one clear task, often 3 to 10 minutes. Split longer topics into a series.
Why add captions to tutorials?
Captions make videos accessible to deaf and hard-of-hearing viewers, help people watching without sound and improve search visibility.
Go deeper with the free masterclass
Workshop, PDF handbook and curated resources for “Recording Great Video Tutorials”.
Related articles

Building an Online Course
Most online courses fail not because the teaching is bad, but because they were never designed to be finished. Here is how to build one that is.
Building Hands-On Labs & Exercises
Most technical training fails not because the content is wrong, but because learners never get their hands dirty. Here is how to design labs that turn watching into doing.
Microlearning & Bite-Sized Content
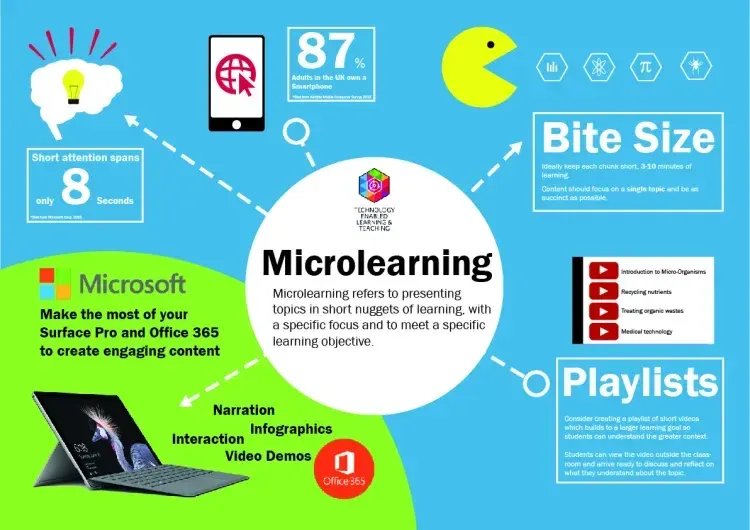
Microlearning gets dismissed as the fast food of training, but the problem was never the small portions, it was the empty calories.
Comments
No comments yet. Start the conversation.